
Do you have a GitHub account with a repository? Improve it with GitHub Actions! GitHub Actions lets you build your own workflows triggered by all kinds of events from your repositories. If you go and check this website, it looks very promising.
Let’s start with a build
To start working with GitHub Actions, just go to Actions tab in your repository page.
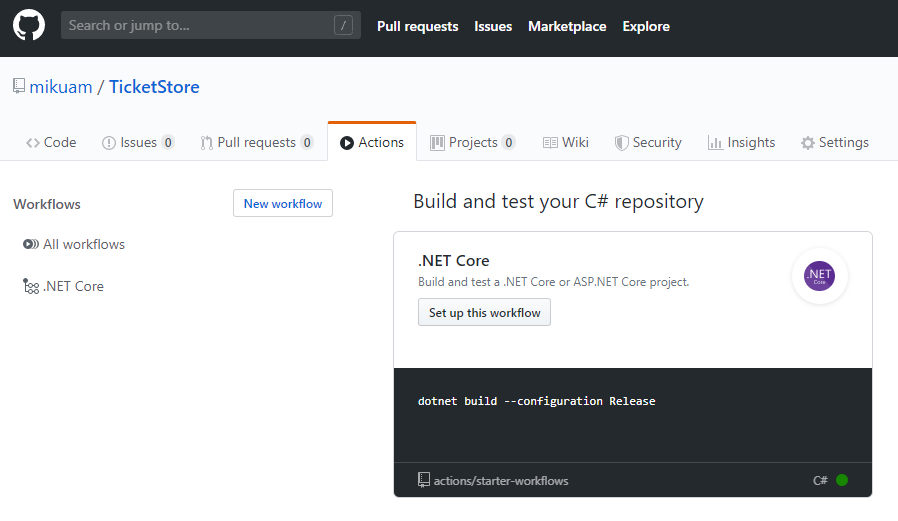
As my repo is built in .Net Core, I can choose this template that GitHub suggests me. After that, we will be able to edit yml file to set up our first workflow. Let’s check how it looks like:
name: .NET Core

on:
    push:
        branches:
            - github-actions

jobs:
  build:

    runs-on: ubuntu-latest

    steps:
    - uses: actions/checkout@v1
    - name: Setup .NET Core
      uses: actions/setup-dotnet@v1
      with:
        dotnet-version: 3.1.100
    - name: Build with dotnet
      run: dotnet build --configuration Release
What to notice:
- “on” tells us what repository event will trigger our flow. Mine will be triggered by a push to branch “github-actions”
- “jobs” – each of those will be visible as a separate big steps
- “build” – job name, that can have multiple small steps
- “runs-on” identify on which operating system workflow is going to be run. You can choose from: ubuntu-latest, macos-latest and windows-latest and because .Net Core can be built on linux, I choose ubuntu-latest
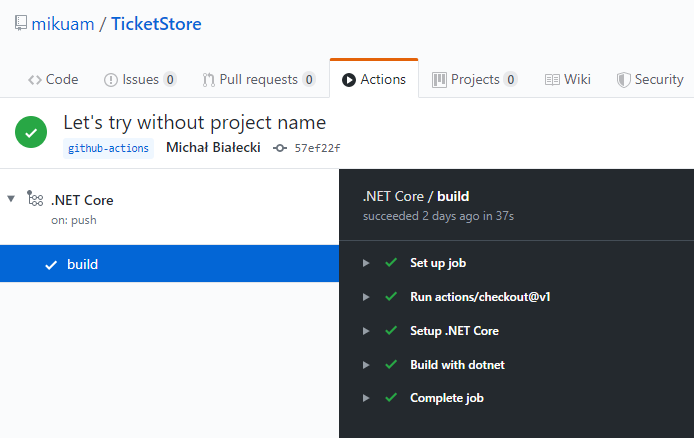
After a few tries to get it right, it resulted as this:
Let’s run unit tests
My repository has a project dedicated to unit tests, so I’d like to run it and check if all tests are passing. In order to achieve that, I just need to add a few lines to my yml file.
name: .NET Core

on:
    push:
        branches:
            - github-actions

jobs:
  build:

    runs-on: ubuntu-latest

    steps:
    - uses: actions/checkout@v1
    - name: Setup .NET Core
      uses: actions/setup-dotnet@v1
      with:
        dotnet-version: 3.1.100
    - name: Build with dotnet
      run: dotnet build --configuration Release
    - name: Run unit tests
      run: dotnet test --no-build --configuration Release
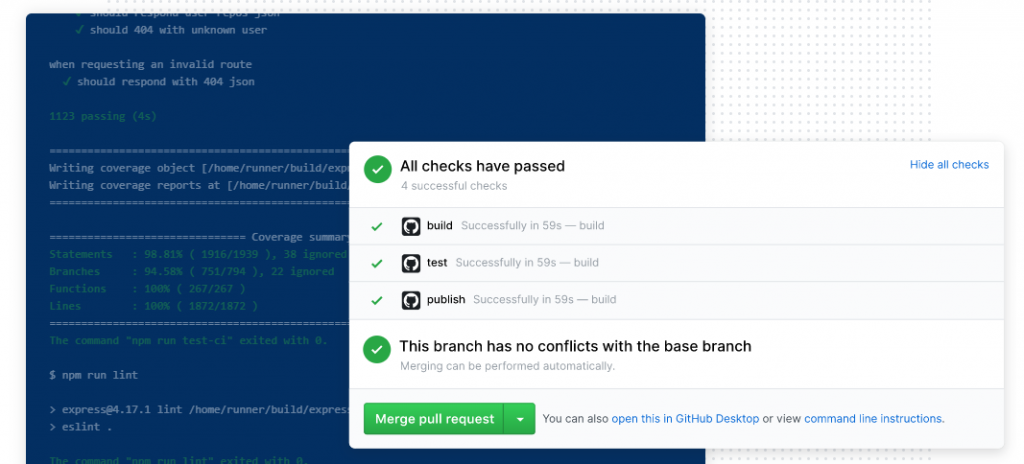
After committing that file, my workflow was run instantly and it took only under a minute to see the results.

What about code coverage?
One of the cool things that we use are actions provided by other users. In order to check our project code coverage, we need to do some things on our side, but to expose the result, we can integrate with Coveralls.io. Let’s go step by step.
The first thing we need to do is to install coverlet.msbuild nuget package in our test projects. This will enable us to generate code coverage file in lcov format.
For code coverage, I created a separate flow.
name: Code coverage

on:
    push:
        branches:
            - github-actions

jobs:
  build:

    runs-on: ubuntu-latest

    steps:
      - uses: actions/checkout@v1
      - name: Setup .NET Core
        uses: actions/setup-dotnet@v1
        with:
           dotnet-version: 3.0.100
      - name: Generate coverage report
        run: |
          cd ./Tests/TicketStore.Tests/
          dotnet test /p:CollectCoverage=true /p:CoverletOutput=TestResults/ /p:CoverletOutputFormat=lcov
      - name: Publish coverage report to coveralls.io
        uses: coverallsapp/github-action@v1.0.1
        with:
          github-token: ${{ secrets.GITHUB_TOKEN }}
          path-to-lcov: ./Tests/TicketStore.Tests/TestResults/coverage.info
This is a slightly more complicated case, where we run “dotnet test” with additional parameters to output code coverage. Then we use coverallsapp GitHub Action to integrate with Coveralls.io. In order to make it secure, we use an existing GitHub token. The result can be checked on the Coveralls page.
Let’s add a cherry on top. Coveralls.io generates a badge, that we can use in our Readme.md file. If I add a link like this at the top:
 [](https://coveralls.io/github/mikuam/TicketStore?branch=github-actions) [](https://github.com/mikuam/TicketStore/blob/master/LICENSE)
Then I can finally see my badges.

Go check for yourself: https://github.com/mikuam/TicketStore
Why it’s so exciting?
I found GitHub Actions very exciting, because:
- it’s free! I host many of my pet projects on GitHub and it never cost me a dime, but now I can configure CI/CD process for free as well
- it supports many languages and frameworks. Even for .Net Framework projects that do not run on .Net Core, I can build them on windows and set up the whole process. I can even run PowerShell scripts
- I can do more and automate things like deploying to Azure or creating NuGet package
Important thing that I noticed is that it doesn’t work with projects in .Net Core 3.1, but when I updated projects to .Net Core 3.0 it worked fine.
I really enjoyed playing around with GitHub Actions and felt a bit like a DevOps guy:) I’m not very experienced in building infrastructure like that, but it was very simple and intuitive. And those badges… now my repository looks professional! 🙂