Monthly Archives: December 2017

Getting started with CosmosDB in Azure with .NET Core

CosmosDB is Microsoft’s new way of storing data in the cloud, comparing to good old MSSQL Server. It offers globally distributed, multi-model database. Interesting fact is that it offers multiple model of storing data: key-value, column-family, documents and graph as shown in this picture:

azure-cosmos-db

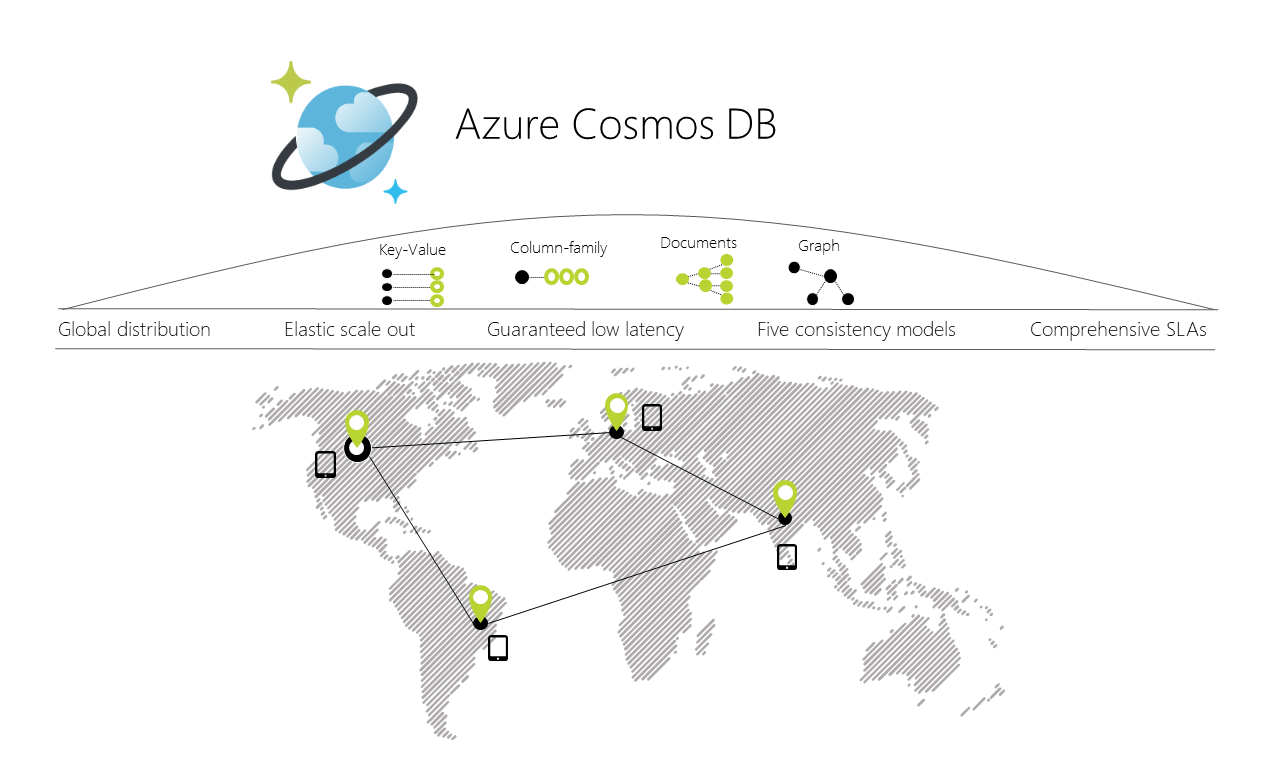
Image from https://docs.microsoft.com/en-us/azure/cosmos-db/media/introduction/

First you need a Cosmos DB account

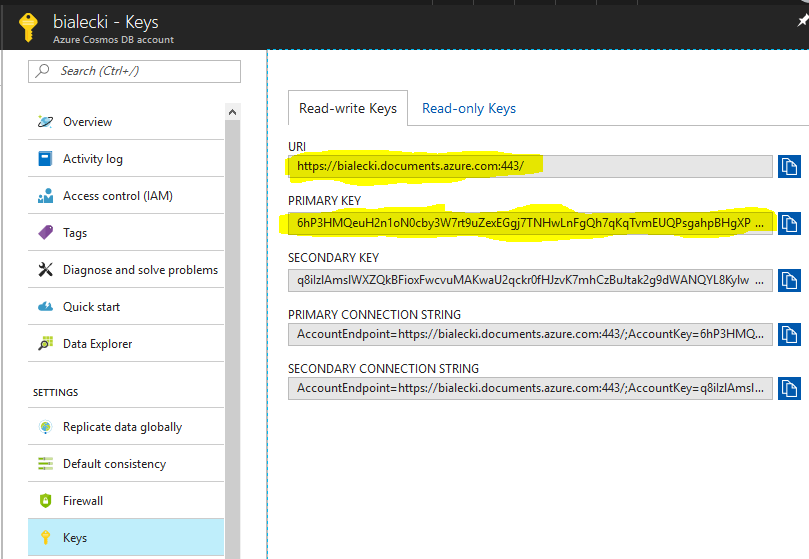
Create a Cosmos DB account, then go to Keys tab – you will need PrimaryKey and EndpointUri.

cosmos-db-keys

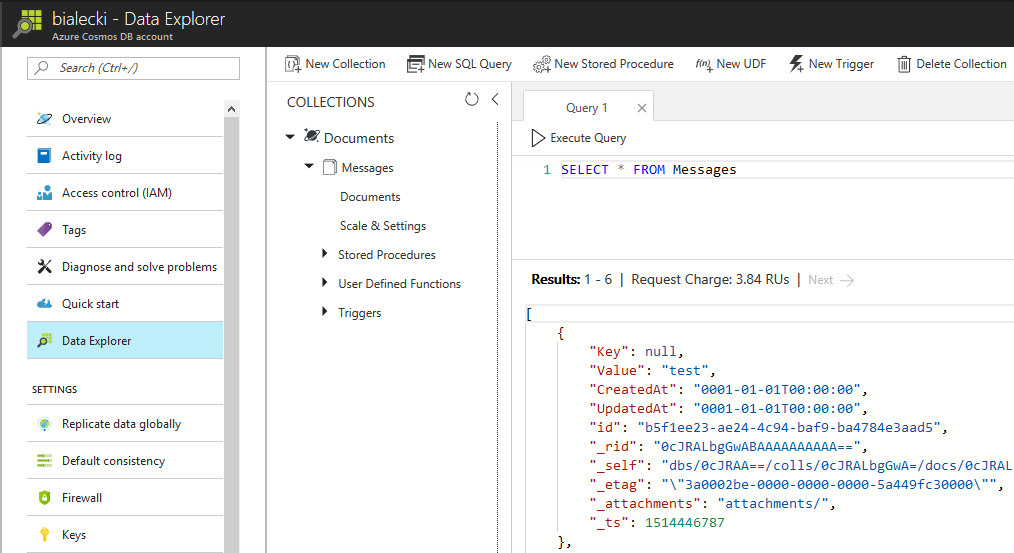
Now go to Data Explorer and create a database and collection. I created Documents database and Messages collection.

cosmos-db-data-explorer

Connecting to Cosmos DB

I’m developing my app in .NET Core and for that I need to install Microsoft.Azure.DocumentDB.Core nuget package. Then I created a DocumentDbService class, that will connect to application to Cosmos DB api.

public class DocumentDbService
{
    private const string DatabaseName = "Documents";

    private const string CollectionName = "Messages";

    public async Task SaveDocumentAsync(DocumentDto document)
    {
        try
        {
            var client = new DocumentClient(new Uri(ConfigurationHelper.GetCosmosDbEndpointUri()), ConfigurationHelper.GetCosmosDbPrimaryKey());
            await client.UpsertDocumentAsync(UriFactory.CreateDocumentCollectionUri(DatabaseName, CollectionName), document);
        }
        catch (Exception e)
        {
            Console.WriteLine("Error: {0}, Message: {1}", e.Message, e.GetBaseException().Message);
        }
    }
}

ConfigurationHelper class is just a static class that gets EndpointUri and PrimaryKey as strings, so you can just paste them here directly. The code above will create a new document in Documents database and Messages collection.

DocumentDto is just a simple object that will be saved as json:

public class DocumentDto
{
    public string StockId { get; set; }

    public string Name { get; set; }

    public float Price { get; set; }

    public DateTime UpdatedAt { get; set; }
}

In order do use it in ASP.NET Core I created a controller:

public class MessagesController : Controller
{
    [HttpPost]
    public async Task<IActionResult> Save([FromBody]SendMessageDto message)
    {
        try
        {
            var document = new DocumentDto
            {
                StockId = message.StockId,
                Name = message.Name,
                Price = message.Price,
                UpdatedAt = DateTime.UtcNow
            };

            await new DocumentDbService().SaveDocumentAsync(document);

            return StatusCode(200);
        }
        catch (Exception e)
        {
            Console.WriteLine(e);
            return StatusCode(500, e.Message);
        }
    }
}

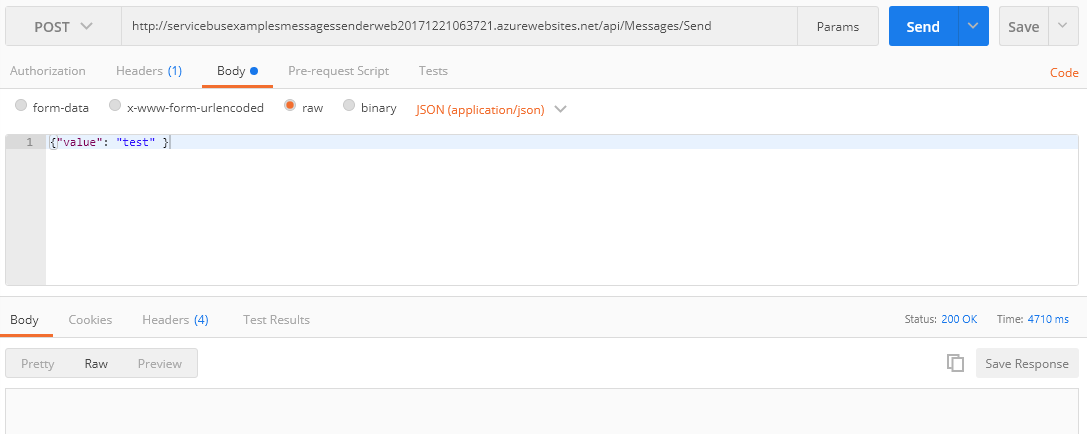
Usage of it is very simple – it creates DocumentDto and store it in Cosmos DB database. To see the result you need to go to Azure’s Data Explorer and fetch for Messages like in a screen above.

Getting data from Cosmos DB with SQL api

Microsoft’s new storage api has ability to store data in a multiple formats. Let’s try getting the latest updates from Messages collection. In DocumentDbService class we need a part of code to get data:

public IQueryable<DocumentDto> GetLatestDocuments()
{
    try
    {
        var client = new DocumentClient(new Uri(ConfigurationHelper.GetCosmosDbEndpointUri()), ConfigurationHelper.GetCosmosDbPrimaryKey());
        return client.CreateDocumentQuery<DocumentDto>(
            UriFactory.CreateDocumentCollectionUri(DatabaseName, CollectionName),
            "SELECT * FROM Messages ORDER BY Messages.UpdatedAt desc",
            new FeedOptions { MaxItemCount = 10 });
    }
    catch (Exception e)
    {
        Console.WriteLine("Error: {0}, Message: {1}", e.Message, e.GetBaseException().Message);
        return null;
    }
}

This is where magic happens. As you can see I used plain old SQL query as it would be Messages table, but instead I queried json objects that does not necessary need to have UpdatedAt field.

Code in the controller is very simple.

[HttpGet]
public IQueryable<DocumentDto> GetTenLatestUpdates()
{
    try
    {
        var documents = new DocumentDbService().GetLatestDocuments();

        return documents;
    }
    catch (Exception e)
    {
        Console.WriteLine(e);
        return null;
    }
}

Notice that GetTenLatestUpdates controller method returns IQueryable interface that on web will be presented as json, but there is also a way to efficiently filter data with OData.

Sending a Azure Service Bus message in ASP.NET core

ASP.NET Core is a open-source web framework that everyone are so excited about recently. There are some good arguments to be excited about it: ability to run on Windows, macOS and Linux, ability to host website in IIS, Nginx, Apache and Docker and it’s fast.

Can it be used for Service Bus scenarios?

Yes, it certainly can. Let’s create a project, that will send service bus message triggered by web request. I’ll create the simplest ASP.NET Core Web Application in .Net Core 2.0 framework.

net-core-create-new-api

Now lets create a helper class to connect to Service Bus.

IMPORTANT: Install Microsoft.Azure.ServiceBus nuget package instead of WindowsAzure.ServiceBus, which will not work with .NET Core.

My ServiceBusHelper class looks like this:

public class ServiceBusHelper
{
    public static QueueClient GetQueueClient(ReceiveMode receiveMode = ReceiveMode.ReceiveAndDelete)
    {
        const string queueName = "stockchangerequest";
        var queueClient = new QueueClient(ConfigurationHelper.ServiceBusConnectionString(), queueName, receiveMode, GetRetryPolicy());
        return queueClient;
    }

    public static TopicClient GetTopicClient(string topicName = "stockupdated")
    {
        var topicClient = new TopicClient(ConfigurationHelper.ServiceBusConnectionString(), topicName, GetRetryPolicy());
        return topicClient;
    }

    private static RetryExponential GetRetryPolicy()
    {
        return new RetryExponential(TimeSpan.FromSeconds(5), TimeSpan.FromSeconds(30), 10);
    }
}

Microsoft.Azure.ServiceBus nuget package differs just a bit from WindowsAzure.ServiceBus so for creating topic you won’t use QueueClient.CreateFromConnectionString method, but rather TopicClient constructor, where you can directly pass custom retry policy.

You probably noticed that I created a ConfigurationHelper class to read vales from config. To have a connection string to your bus in a file, add appsettings.json file your peoject. Also set it’s properties to Content and Copy if newer. This way it will be copied to server when project is deployed. My configuration file looks like this:

{
    "ServiceBusConnectionString":
      "Endpoint=sb://bialecki.servicebus.windows.net/;SharedAccessKeyName=RootManageSharedAccessKey;SharedAccessKey=[removedForSafety]"
}

And ConfigurationHelper class looks like this:

public static class ConfigurationHelper
{
    private static string connection;

    public static string ServiceBusConnectionString()
    {
        if (string.IsNullOrWhiteSpace(connection))
        {
            connection = GetServiceBusConnectionString();
        }

        return connection;
    }

    private static string GetServiceBusConnectionString()
    {
        var builder = new ConfigurationBuilder()
            .SetBasePath(Directory.GetCurrentDirectory())
            .AddJsonFile("appsettings.json");

        var config = builder.Build();

        var value = config.GetValue<string>("ServiceBusConnectionString");
        return value;
    }
}

All code needed to connect to service bus is complete – congrats:)

However our job is not yet done. I mentioned earlier that I want to send messages to the bus triggered by web request. Do achieve it I need to have a controller:

public class MessagesController : Controller
{
    [HttpPost]
    public async Task<IActionResult> Send([FromBody]SendMessageDto mesaage)
    {
        try
        {
            var topicClent = ServiceBusHelper.GetTopicClient();
            await topicClent.SendAsync(new Message(Encoding.UTF8.GetBytes(mesaage.Value)));

            return StatusCode(200);
        }
        catch (Exception e)
        {
            Console.WriteLine(e);
            return StatusCode(500, e.Message);
        }
    }
}

public class SendMessageDto
{
    public string Value { get; set; }
}

Notice that there is no ApiController. In .NET Core there is only one Controller that can be used both to handle api logic and return json, or serve views for a web page.

In order for routing to work I also added some code in Startup class.

public void Configure(IApplicationBuilder app, IHostingEnvironment env)
{
    if (env.IsDevelopment())
    {
        app.UseDeveloperExceptionPage();
    }

    app.UseMvc(routes =>
    {
        routes.MapRoute("default", "api/{controller=Home}/{action=Index}/{id?}");
    });
}

Publishing to Azure App Service

Since it is much better to test an app online instead of locally, I published it with Azure App Service. It’s a powerful tool for deploying and scaling web, mobile and api apps running on any platform. Microsoft also says that it ensures performance, scalability and security, but the most important for me is that you can deploy your app within couple of clicks from Visual Studio.

net-core-publish-to-azure-service-app

Now I can test my app by making POST request like this:

net-core-sending-request-to-app-service

And the response is 200! To sum up:

  • there is no problem with writing code in .Net Core or .Net Standard using Azure Service Bus
  • Core already written for regular .Net Framework will not work, but it’s not a big job to make it compatible
  • Working with event hubs and relays will require to install separate nuget packages

To read more about Azure Service Bus nuget package go to this accoucement.

All code published here can be found in my public github repo.