Application Insights(AI) is a park of Azure clous services, that gathers application telemetry data and is able to show it with nice charts. User can also query gathered data to create custom reports.
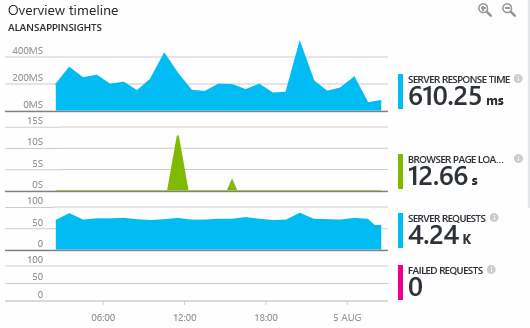
To gather telemetry data user must only enable it in Visual Studio. Detailed instructions can be found here: https://docs.microsoft.com/en-us/azure/application-insights/app-insights-asp-net
Creating custom data source
Underneath pretty charts and fancy numbers there are powerful mechanisms that can fast analize and query gigabytes of data. There is a way to use it with your own data. Firt thing what need to ba done, is to have data, that we will be providing. In this example I will just copy generated file to a separate blob storage, where it can be fetched from AI. My file looks like this:
{"ProductId": "P1", "Stock": "110", "UpdatedAt": "2017-08-13T14:50:28Z"}
{"ProductId": "P1", "Stock": "109", "UpdatedAt": "2017-08-13T14:50:48Z"}
{"ProductId": "P1", "Stock": "112", "UpdatedAt": "2017-08-13T14:51:08Z"}
{"ProductId": "P1", "Stock": "114", "UpdatedAt": "2017-08-13T14:51:28Z"}
Notice that separate lines are valid json, but whole file is not. Also one item of data should take exactly one line. Second option is to provide json table with brackets.
To add new data source go to Application Insights page and use button on the left side:
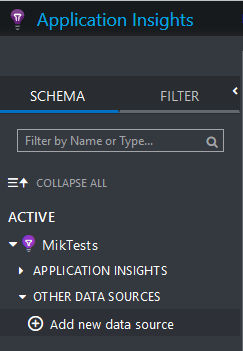
If you don’t have this option – you probably do not have permissions to do so.
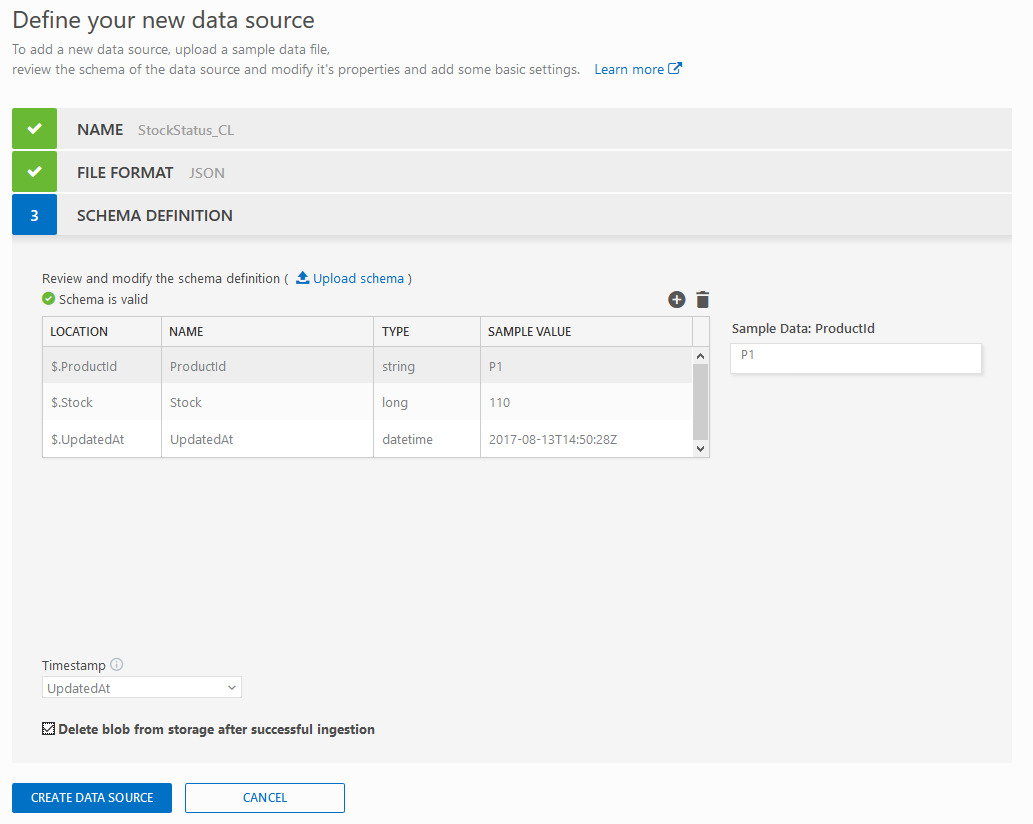
As a file format you can specify either CSV or Json. You can also provide a part of the file you will be importing, but it has to have at least 10 rows.
Transfer file to Application Insights
To transfer file to AI, file has to be copied to blob storage and then AI needs to be notified, what file to download. Like in this schema:

Number 1 is quite obvious, just copy your file to blob storage. Second step is a bit tricky, because you will need couple of information. After creating a custom data source, there is a “How to send data?” link of the right, that might help you.
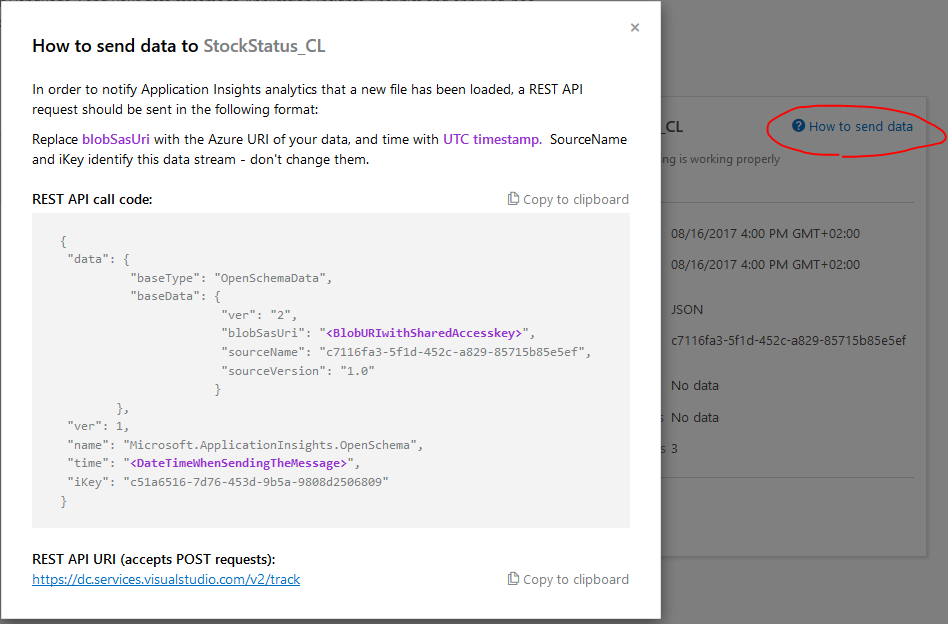
To get “blobSasUri” go to your blob storage and then to Shared Access Signature – you can generate it there. In time just format current time in ISO format. Full query should resamble something like this:
{
   "data":{
      "baseType":"OpenSchemaData",
      "baseData":{
         "ver":"2",
         "blobSasUri":"https://miktests.blob.core.windows.net/mikai/stockData.json?sv=2017-04-17&ss=b&srt=sco&sp=rwdlac&se=2019-09-04T06:08:37Z&st=2017-09-03T22:08:37Z&spr=https&sig=#############",
         "sourceName":"########-####-####-####-############",
         "sourceVersion":"1.0"
      }
   },
   "ver":1,
   "name":"Microsoft.ApplicationInsights.OpenSchema",
   "time":"2017-09-03T22:13:01Z",
   "iKey":"########-####-####-####-############"
}
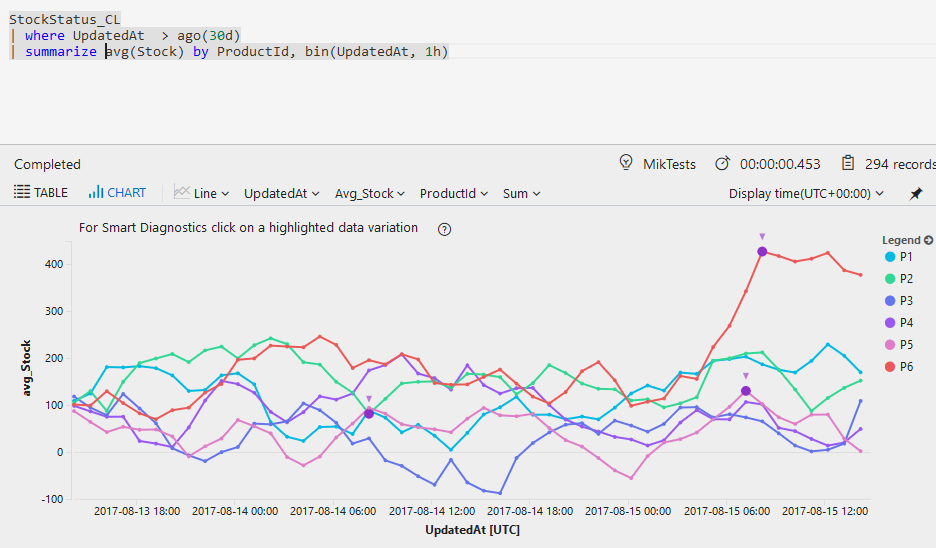
After sending a POST request with correct body – it should return 200 response and in couple of minutes data should be pulled in to Application Insights. So you should be able to do something like this:
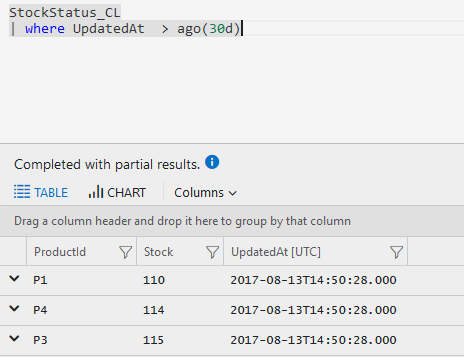
Or even like this:
